RSS

Category Archives: Wrap

Crochet Scarf

At 16 inches wide, this scarf is much wider than a normal scarf, this due to the fact that on occasion it is required to double as a head covering.

The scarf is required to be light and airy with an overall design suitable for all occasions. Black yarn was chosen as I felt this would be perfect for any formal occasion. It would also blend with any other colour, yet look casual when required.

I used scrap yarn to work a swatch to determine the finished size of the scarf and also to get an idea of the look of the final project. I worked a foundation chain equal to the number of motifs required for the finished length of the scarf, then simply worked repeated rows of motifs until I achieved the desired width of the finished scarf.

The design is worked from the bottom up, instead of from the beginning to the end of the length of the scarf. It can clearly be seen that this scarf could quite easily become a stole/shawl, simply by increasing the number of rows of motifs used.

Materials for this project:
Yarn: Black Acrylic 4ply machine knitting yarn
Needles: 3.00mm crochet hook.
Scarf measures: 16” wide x 72” long

The instructions for the motif used to make this scarf is shown in the video below….


Leave a comment

Posted by on December 29, 2017 in crochet, Hat, Hood, Lace, Scarf, Shawl, Uncategorized, Wrap


Tags: , , , , ,

Bruges crochet lace

I have recently tried Bruges crochet lace for the first time and I absolutely love it. Although simple, it’s endlessly creative when combined with other crochet techniques. The only limit is your own imagination.

Bruges crochet lace was developed as a method of imitating the appearance of a vintage handmade bobbin lace known as “Bruges lace”. Bruges crochet lace is much less complicated than the traditional vintage bobbin lace making technique.

Traditionally, Bruges crochet lace has been made with white cotton and linen thread, but almost any yarn of any colour can be used. Bruges crochet lace is a really easy technique, even for a beginner. The basic ribbon/tape can be used as a simple edging for many projects; such as garments, linens, shawls, scarves, tablecloths and much more.

You can make a simple piece by joining basic strips, or you can make more complex pieces requiring curved turns and arches.

The basic Bruges crochet lace ribbon/tape is a thin crocheted strip, composed of rows of double crochet stitches which can vary from 3 -5 or more, depending on the width of tape required. Each row is separated by a number of turning chains that stand out in arches, which creates a lacy effect, but are also functional connecting links that give the desired shape. The real beauty and creativity of Bruges crochet lace ribbon/tape comes into its own when you add shape to make the lace turn and curve.

This method of creating lace tape is quite simple but the resulting lace is very beautiful, both alone or when combined with other crochet techniques.


Tags: , , , , , , ,

Crochet Mini Shawl – Wrap

The design used to make this shawl was copied form a photograph of a sweater. The shawl is light but warm, and not too fussy. It is suitable for evening wear or informal day wear. The shawl is designed to be worn by someone who is required to be in a sitting position for prolonged periods of time. The advantage is that because the shawl is shorter, your hands and arms are not required to control the fabric. When worn as shown above, the shawl does not slip from the shoulders. However, it can of course be worn by anyone, in many styles, and can be secured with a shawl/scarf pin if desired.

There are many variations on this design. But the particular interest of this version is the fact that the double crochet stitches in the central diamond shaped motif are worked in-between the double crochet stitches of the previous row. Instead of, as is usual, being worked into the top of the stitches of the previous row.

The shawl measures 26 inches wide and 38 inches in length. It is worked in 4 ply machine yarn, approx 325 grms. Colour, light silver grey, using 3.00 crochet hook.


1 Comment

Posted by on March 23, 2017 in Bed jacket, Blanket, crochet, Shawl, Shrug, Uncategorized, Wrap


Tags: , , , , ,

Crochet Capa-Cuello – Neck Coat – Neck Cape – Capelet No.2

novmoney16

Having made my first Capa-Cuello back in August this year (https://grippingyarns.wordpress.com/2016/08/20/crochet-capa-cuello-neck-coat-neck-cape/), I stated that it was my intention to make many more in lots of different colours and designs. So for the second one, I thought I would try a design of my own. I decided that my design had to be worked in the same manner as the original. In one continuous piece from the front opening edge, as this resulted in a really nice fit.

novback16

I have always liked the pineapple motif and thought it would be a perfect addition to the design, as it is very adaptable and always looks very nice. However, it proved to be quite a challenge to fit the pineapple motif into the fixed number of rows required for sectional repeats of the design. But I think it worked out very well in the end. Finally, as with the previous Capa Cuello, I finished the project by working five button loops along the right front edge and crocheted five buttons, which I attached to the left front edge to close the front.

novfull16

This project was very easy to crochet. The size of the garment is determined by the number of pattern repeats. I worked 10 repeats for my project but obviously this number can be reduced or increased as required.

I think my design is just as beautiful as the original.


Leave a comment

Posted by on November 25, 2016 in Bed jacket, crochet, Scarf, Shawl, Uncategorized, Wrap


Tags: , , , , ,

Knitted Scarf

moneyshot

The inspiration for this scarf came from the Arabella shawl by Skeino. The shawl is made in a fine Merino yarn, and is knitted in garter stitch, using the technique of short rows to create triangles of different colours. A lacey row connects each triangle with the next to create a beautiful shawl. I thought this technique would make a great scarf.

There is an official Arabella Scarf http://www.skeino.com/knitting-kits/arabella-scarf.html which is very nice. However, I wanted the design and shape of the Arabella shawl, only scarf sized. I also wanted it made in thicker yarn.

blog

I used the free pattern http://www.ravelry.com/patterns/library/arabella-shawl, making only a few changes. I cast on only 78 sts, used yarn in two colours only, cast on only 10 sts on the change yarn row, and worked 26 triangles of the same size to achieve the length I required. My scarf measures approximately 60 inches long at the cast off edge and 9 inches wide.

To make my scarf:
Yarn Type: 100grm DK Acrylic hand knitting yarn in each colour (black & Grey).
Needles: 4.00mm (UK8) circular knitting needle.
Method: Follow the free pattern.

The video below may also be helpful.

My scarf is unusual and drapes beautifully!


Leave a comment

Posted by on October 30, 2016 in Knitting, Scarf, Shawl, Wrap


Tags: , , ,

Crochet Capa-Cuello – Neck Coat – Neck Cape – Capelet

Augshot1

I’m always cold and find my aches and pains become worse with the colder weather. I suffer particularly badly with neck and back pain. Even on a warm summer day, I can have a problem with a draft as a result of sitting near an open window or driving with open car windows. The easy answer, you would think, is a scarf or a shawl. However, I can’t always deal with the bulk of a scarf or shawl, and certainly not when indoors.

Augshot2

I think I’ve found the perfect thing for my neck problems. It’s called a Capa-Cuello (Spanish) which, according to Google, translates to “Neck Coat”.

Augshot4

The original design has no front closure. I think the video suggested that the opening is held together by a broach. However, I did not want to do this. So I worked five button loops along the right front edge and crocheted five buttons, which I attached to the left front edge to close the front. I think it looks a lot better and is much more practical for everyday use.

Augshot3

This project was very easy to crochet. The size of the garment is determined by the number of pattern repeats. I worked 12 repeats for my project, but obviously this number can be reduced or increased as required.

To make my Capa – Cuelo:
Yarn Type: 125grm DK Acrylic hand knitting yarn.
Needles: 5.00mm crochet hook.
Method: Follow the video below.

The video tutorial is in Spanish, but the person demonstrating is very good and can be followed easily. I found that this is best done with the sound off. I watched the video twice in order to understand the basics, then watched a third time, pausing the video to write down firm instructions on paper to work from.

I think my Capa-Cuelo is beautiful. It can be made with any weight yarn, for example, lighter weights for spring/summer. I intend to make many more in lots of different colours and designs.


1 Comment

Posted by on August 20, 2016 in Bed jacket, crochet, Scarf, Shawl, Wrap


Tags: , , , , ,

Crochet Flower Motif

shot7

I was given the instructions (which consists entirely of the scrappy diagram below) for this motif by a friend. It was used by her mother to make a beautiful evening jacket. Neither my friend nor her mother knew of it’s origins but thought that it came from a rather old book of crochet patterns.

shot8

The most interesting thing about this motif is that it is worked from the outside in? Most crochet motifs are worked by forming a very small ring in the centre and working out to the edge of the finished motif. This motif starts with a large outer ring of 48 chains, then the inner part of the diagram is worked, and each of the seven chain loops are joined at the centre…

shot3

…to form a small motif.

shot1

The double crochets and picots are then worked around the outer edge to finish the motif.

shot5

The finished motifs are then linked by crocheting together at the picots. This is a huge plus in my book, as I hate sewing motifs together!

shot6

This is a beautiful little motif, which makes a very delicate looking fabric that would be perfect for shawls, stoles, shrugs or anything that would benefit from being worked in light lacy fabric.


Tags: , , , , , , , ,

Spider Stitch Crochet Wrap – Stole – Shawl

money_shot

This gorgeous wrap/shawl/stole is perfect for those not so warm summer evenings. It is light and airy but not too wispy. It has a cottony texture with a subtle sheen, and it’s perfect for those evening walks along the beach. It would also be warm enough for the autumn.

The yarn used for this project was found in my yarn stash; five balls of unidentified yarn in variegated shades of pink, oatmeal and brown. Unfortunately, there was no information on the balls of yarn. I therefore, have no idea of the manufacture or type. It is variegated both in colour and texture. It is a mixture of cotton and man-made fibre, each ball weighs 100 grams, and all five balls were used to make this project.

I chose to use the spider stitch/design….

stitching_closeup

There are many variations on the spider stitch/design, but I chose the version shown in the tutorial below, because it is simple and not overly fussy looking.

As usual, I worked a swatch to determine the appropriate hook size and the size of the finished item. I also decided that I preferred the design facing the opposite way to that shown in the video. I therefore worked horizontally across the length of the wrap, instead of vertically as shown in the video.

The design: Worked over multiples of 6 cells plus 1
Wrap measures: 74”x 26” (not blocked)
Yarn Type: Unknown
Needles: 3.50mm crochet hook.

edging_detail

I did not want elaborate edging or a fringe, so I finished the edges by simply working two single crochet in every chain space, and five single crochet in every corner around the edge.

The finished project looks beautiful, and is equally suitable for a semi-formal or casual occasion. The colour is absolutely fabulous with denim!


2 Comments

Posted by on August 24, 2015 in crochet, Shawl, Wrap


Tags: , , , ,

Hairpin Lace Crochet Shrug – Bed Jacket

moneyshot

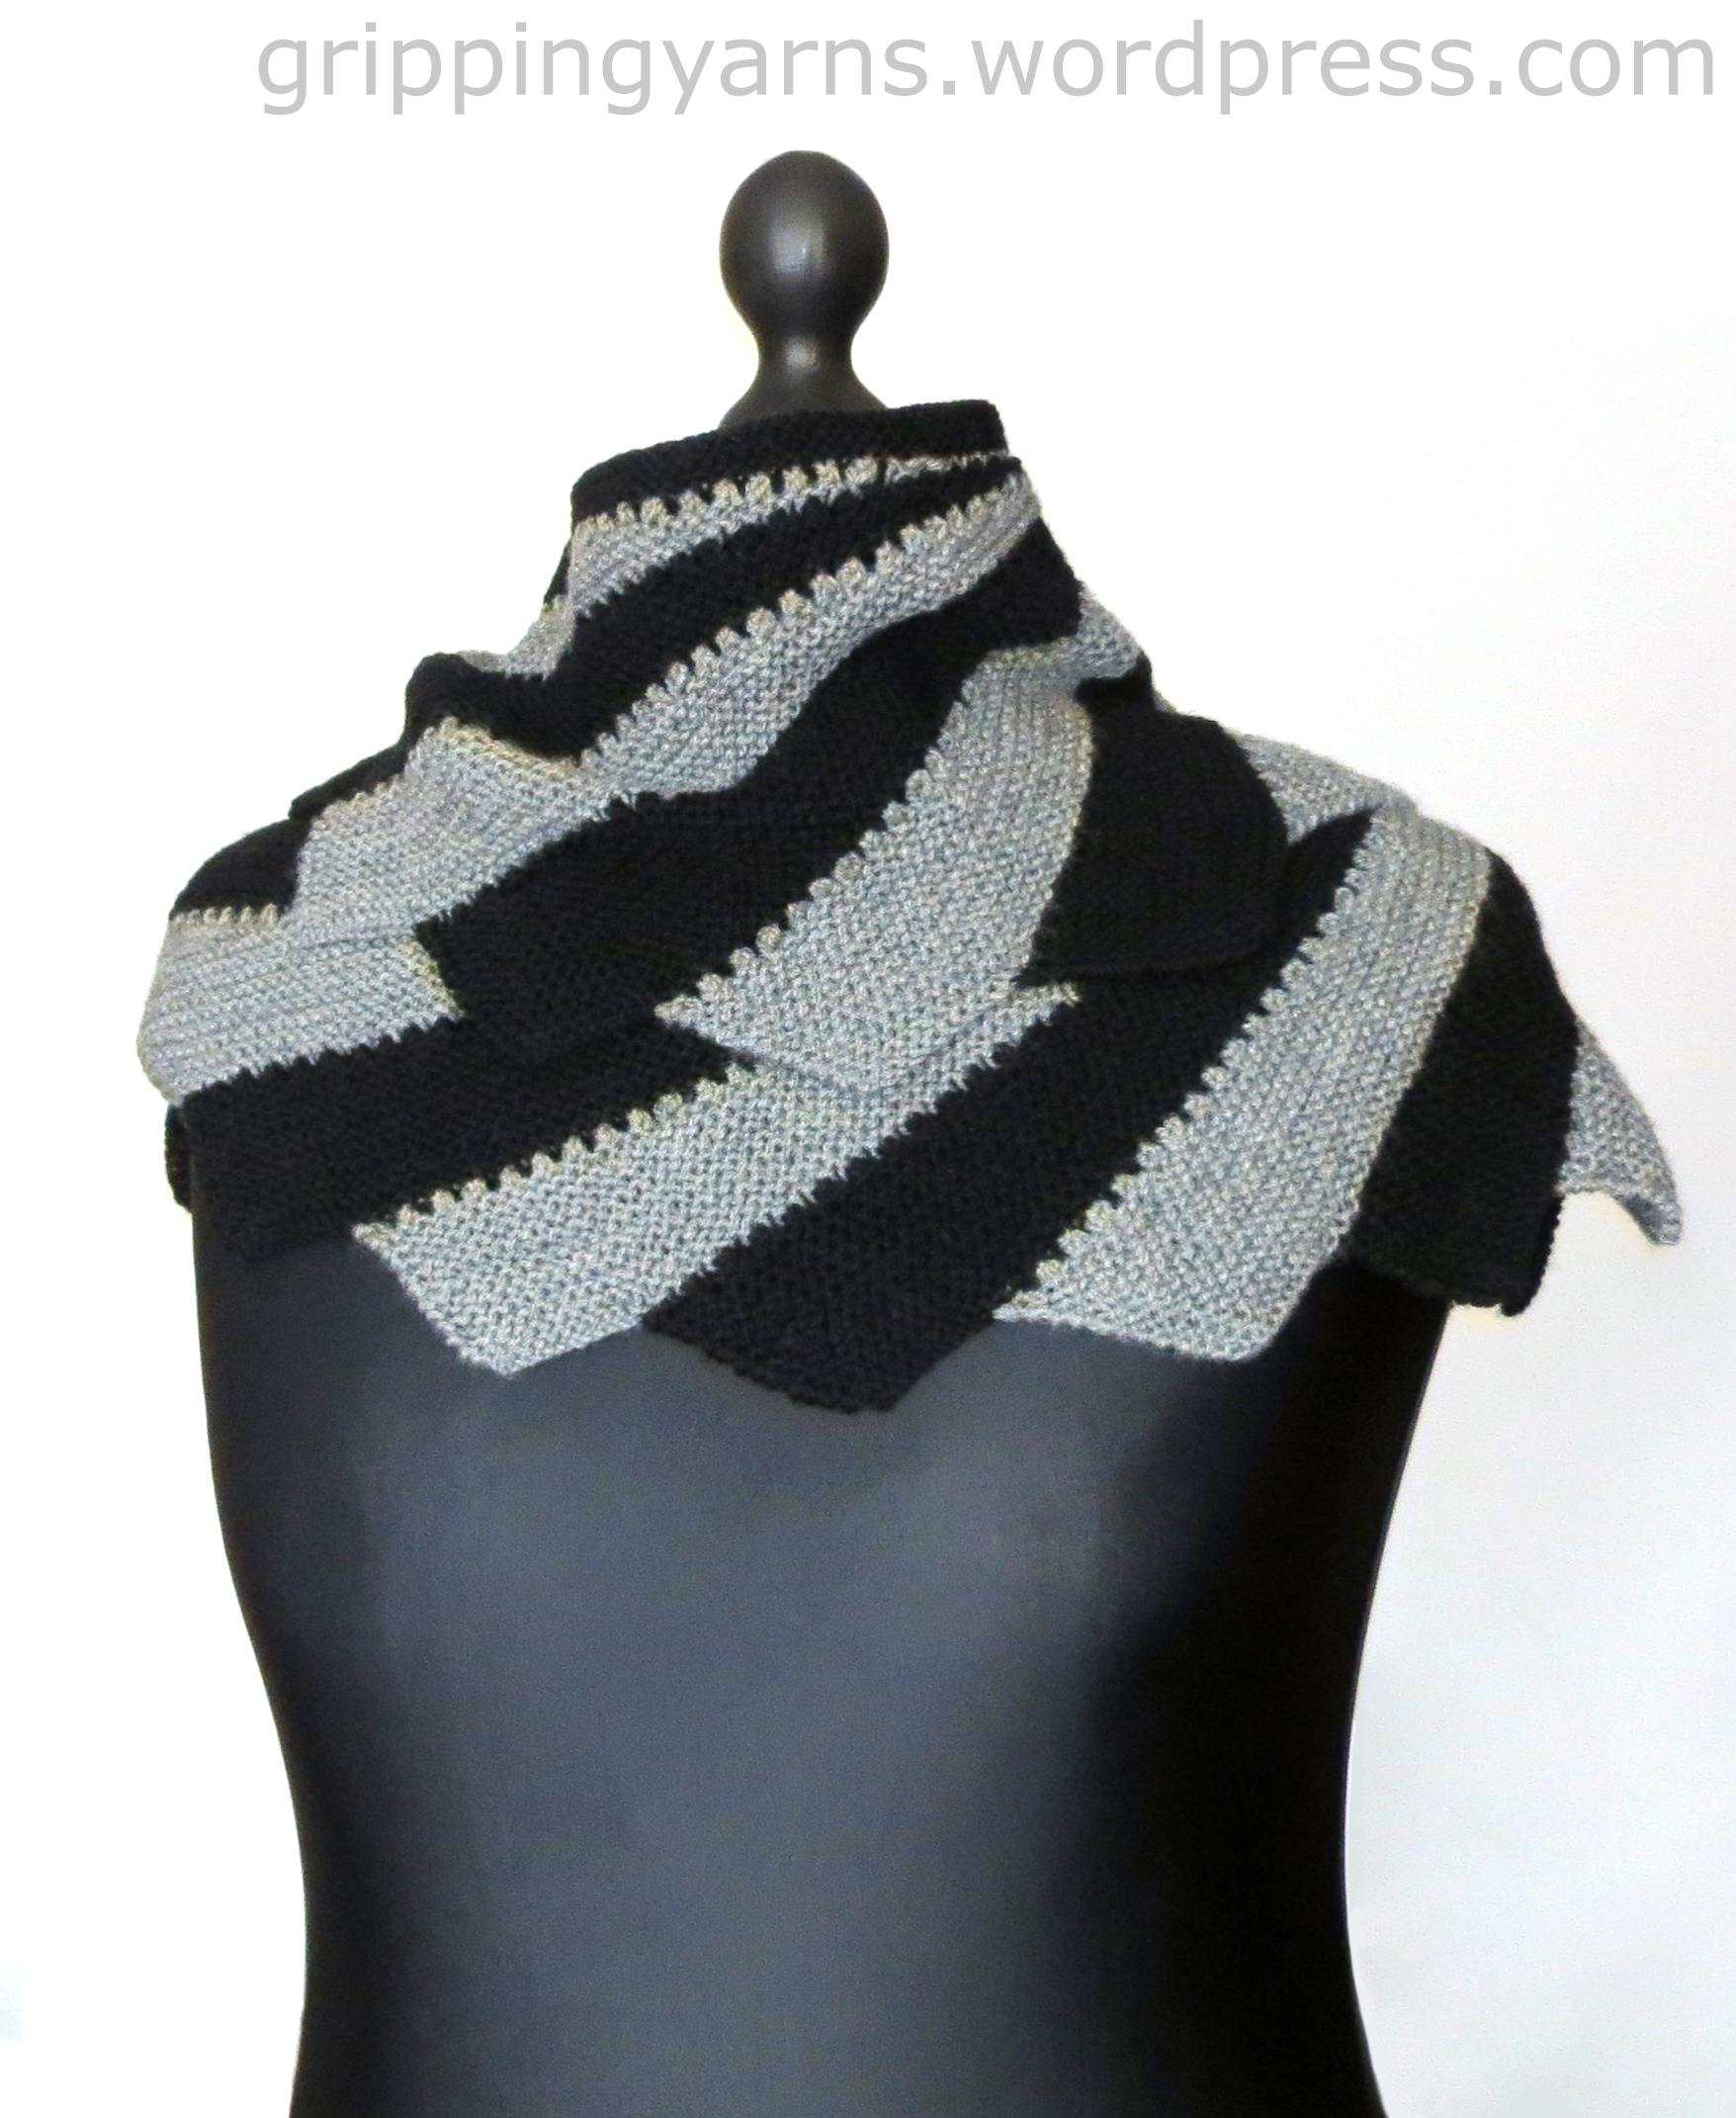
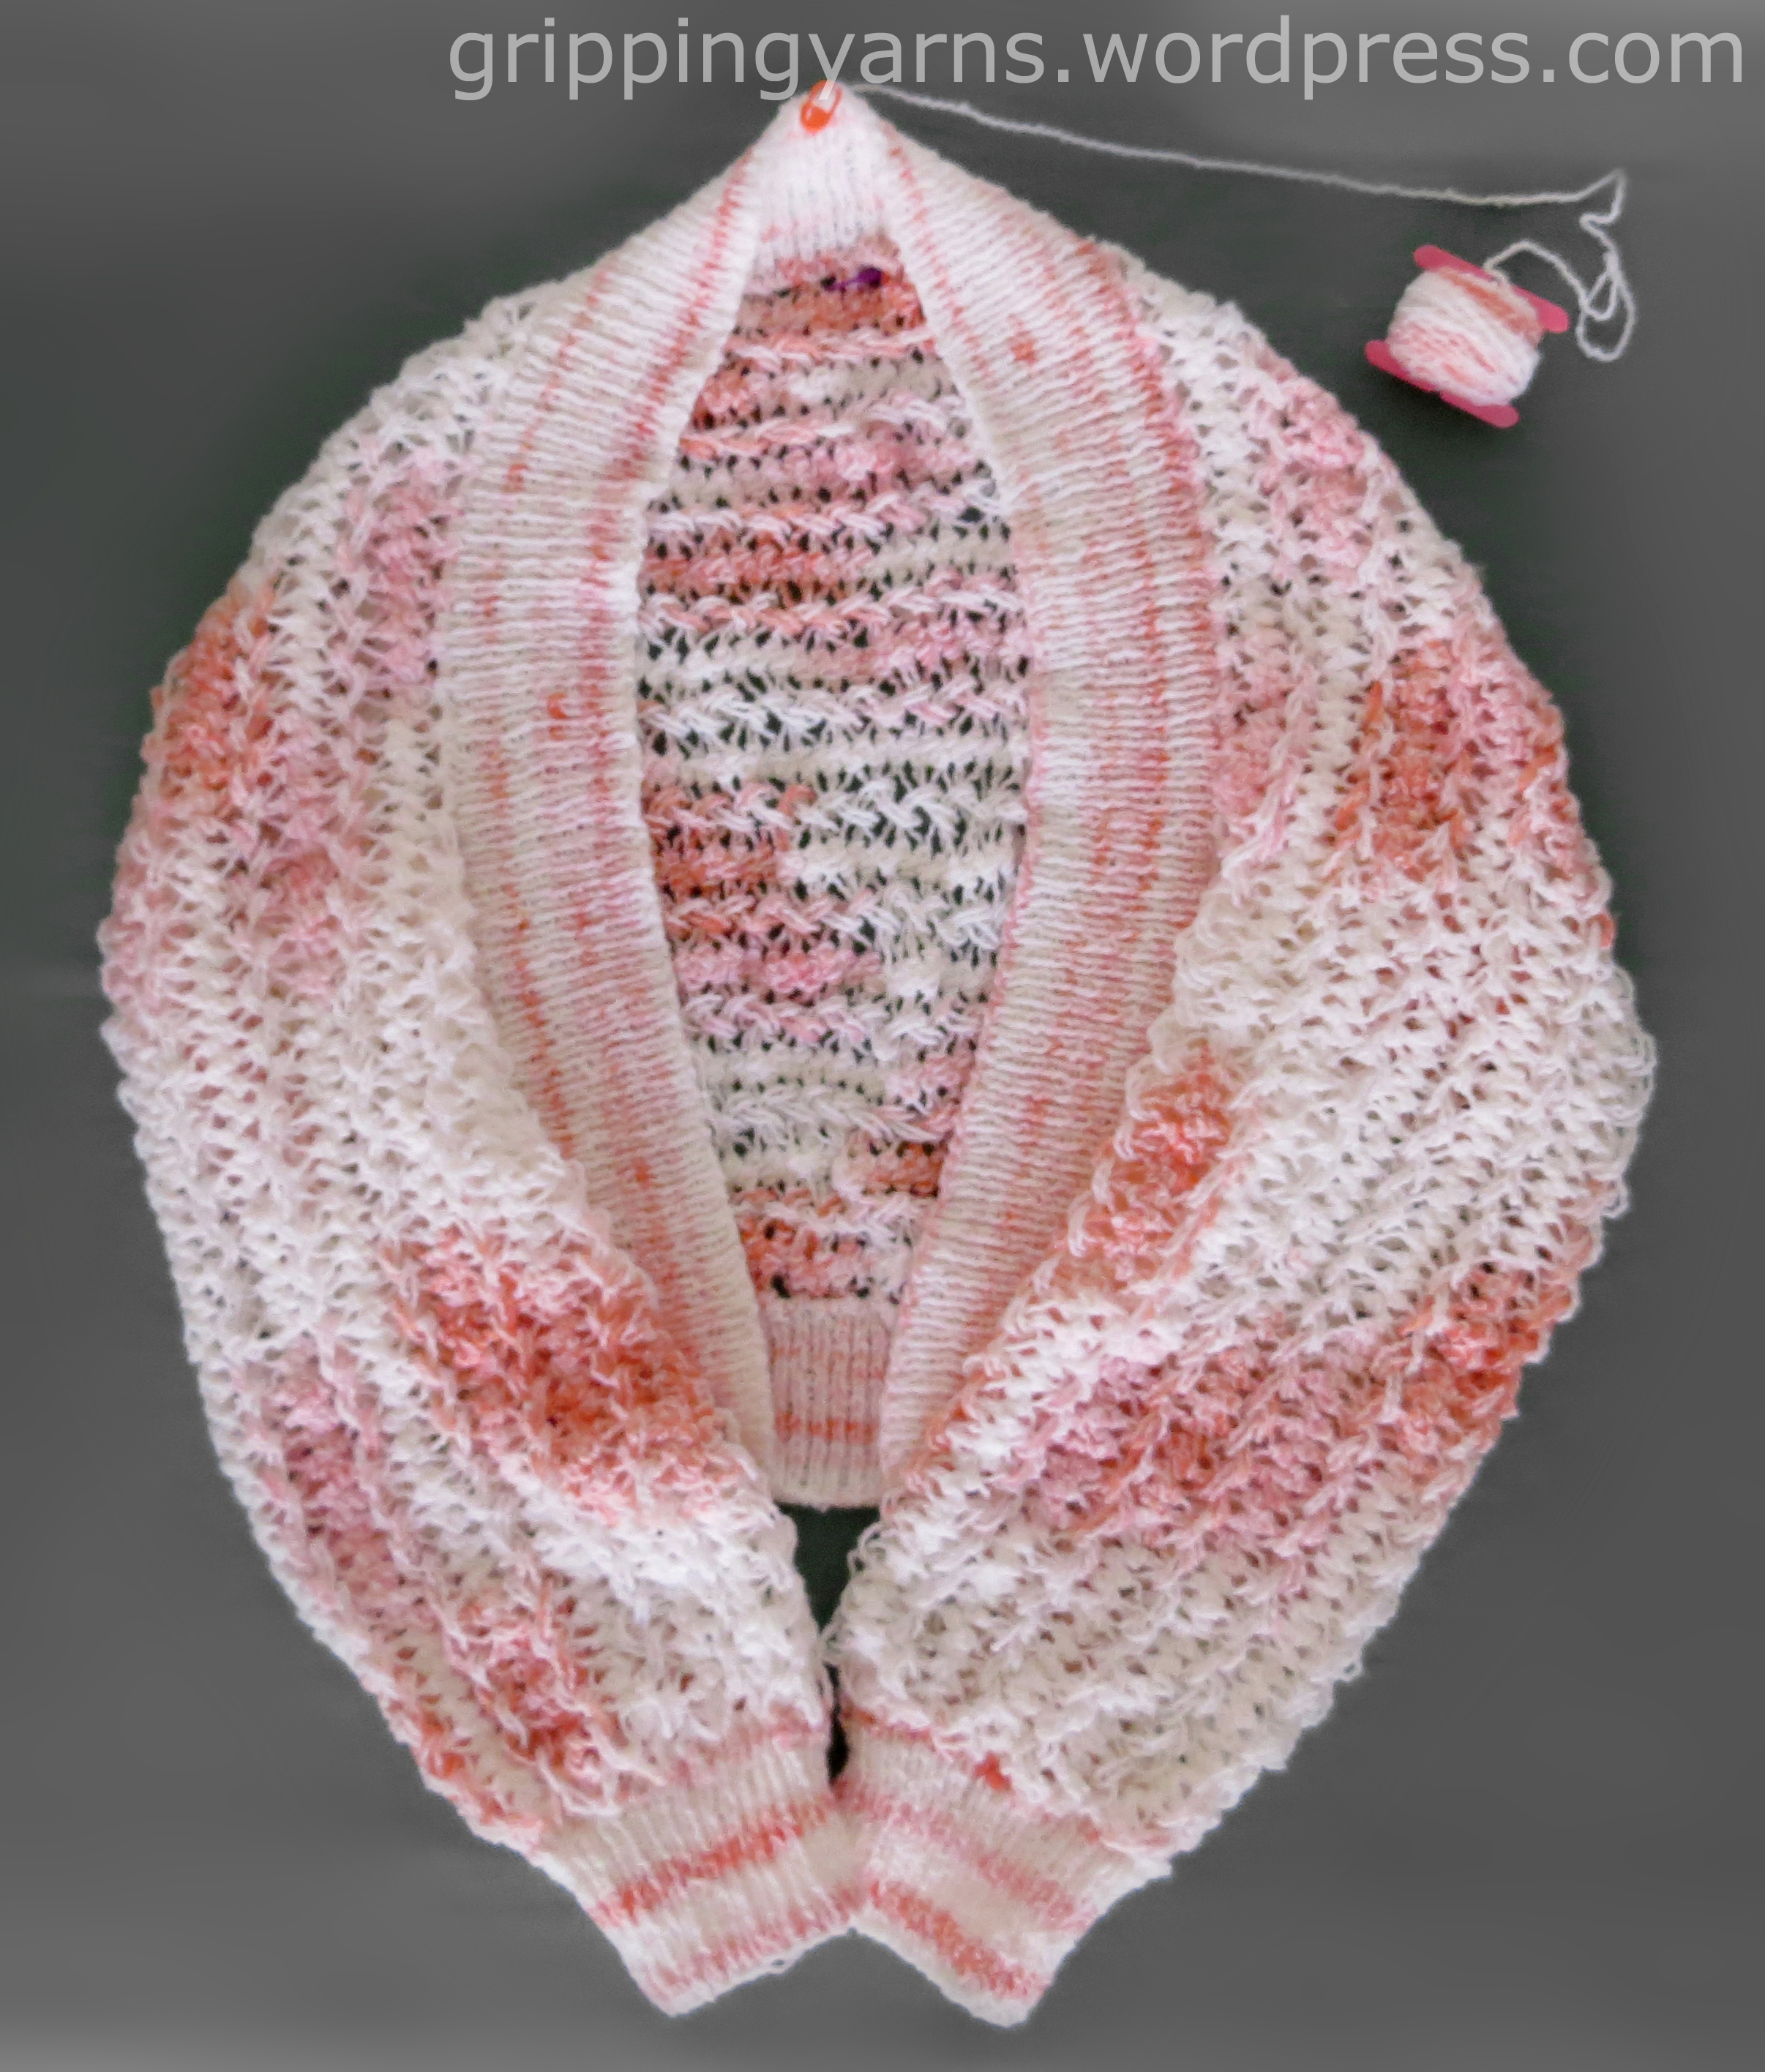
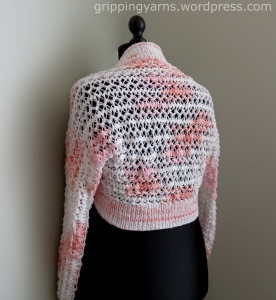
I had the idea for this Shrug/Bed Jacket while sitting up crocheting in bed, with one of my shawls around my shoulders. The shawl felt a little too warm, it continually slipped off my shoulders and the fringe was tangled in my crochet yarn. I needed something that, while protecting my neck and shoulders from any cold draft, would not feel too warm or slip off my shoulders, and most importantly, would not get in the way of my crocheting. A Shrug type Bed Jacket would be ideal and Hairpin Lace would be the perfect technique for this project as the fabric is pretty, lightweight, lacy and works up very quickly.

In my yarn stash, there were 10 balls of unidentified yarn (five balls in variegated shades of white, pink and orange, and five balls in variegated shades of pink, oatmeal and brown). I thought the lighter shaded colours would be perfect for this project. Unfortunately, there is no information on the balls of yarn. I therefore, have no idea of the manufacture or type. It is variegated both in colour and texture, it is a mixture of cotton and man-made fibre, each ball weighs 100 grams and four balls were used to make this project. The finished back length (including rib) is 20 inches and the sleeve length (including rib) is 18 inches.

backview
I had no pattern or instructions for this project. I simply made it up as I went along. I made a swatch of the lace fabric and worked out the whole thing, based upon my height of 5 feet 9 inches. There are no body measurements to consider as this is not a fitted garment. If you are shorter or taller than 5`9”, you can easily vary the size by decreasing or increasing the number and the length of the strips of lace used.

toolshot joiningdetailedview

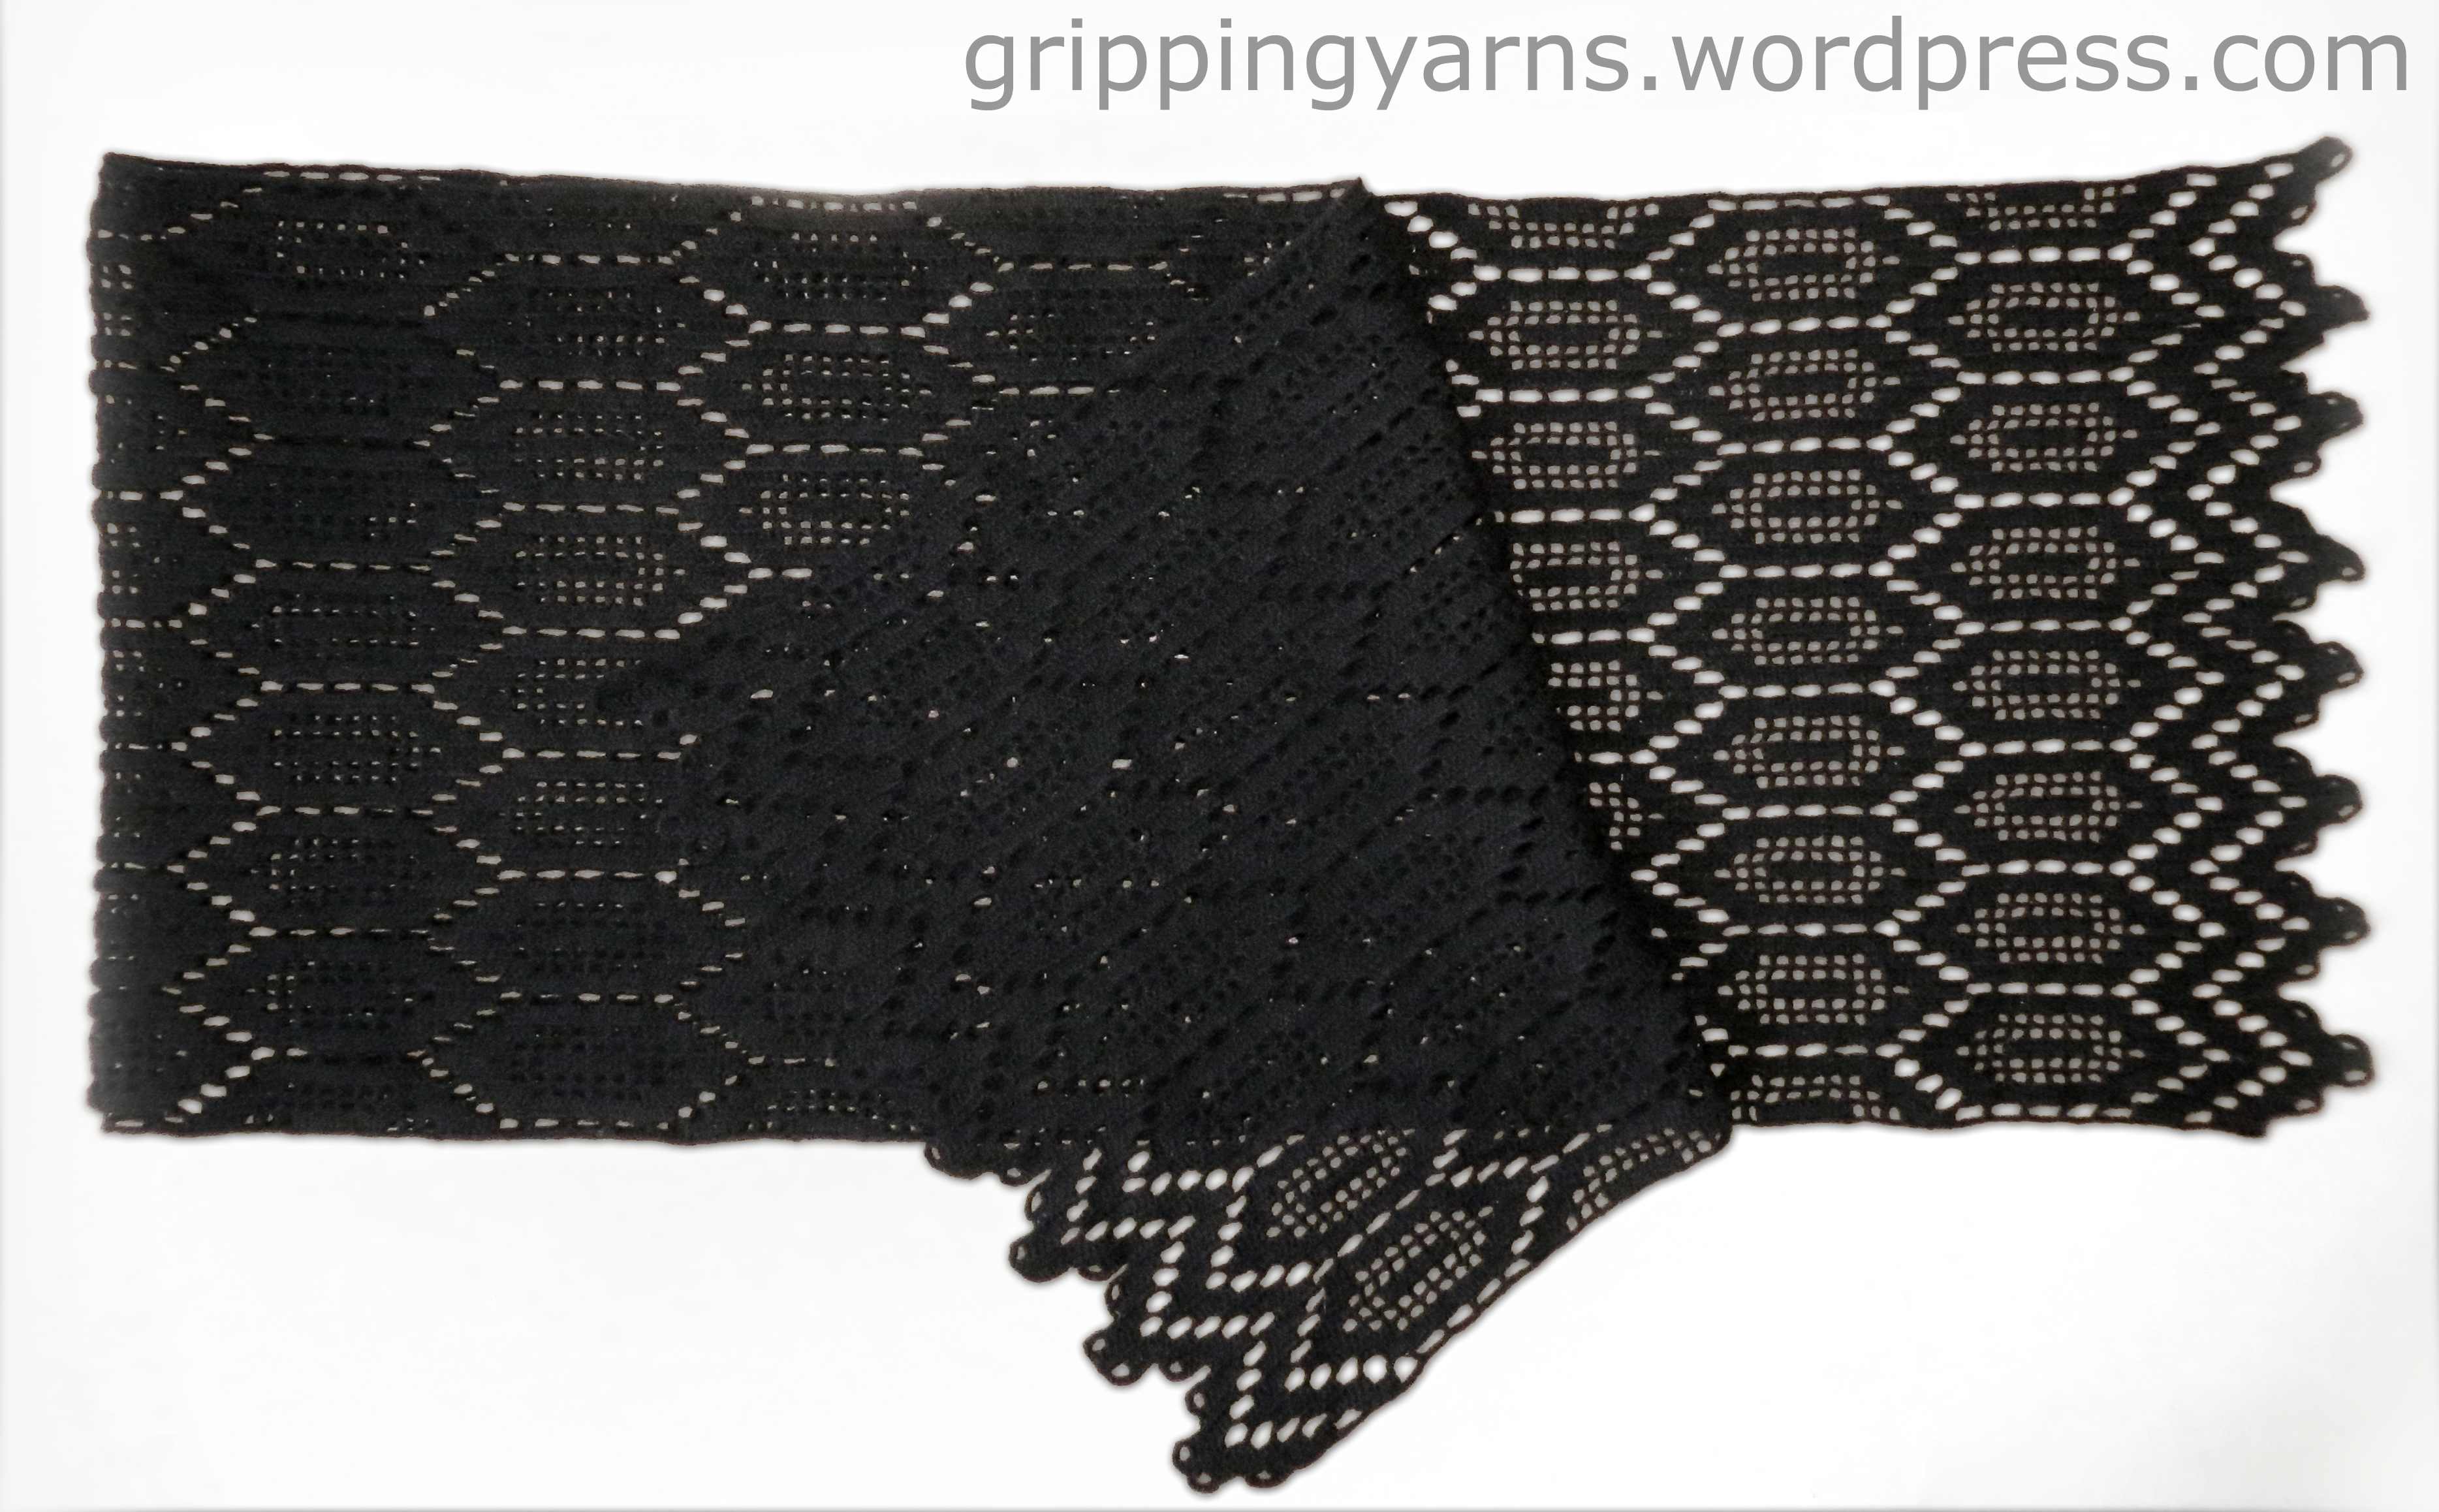
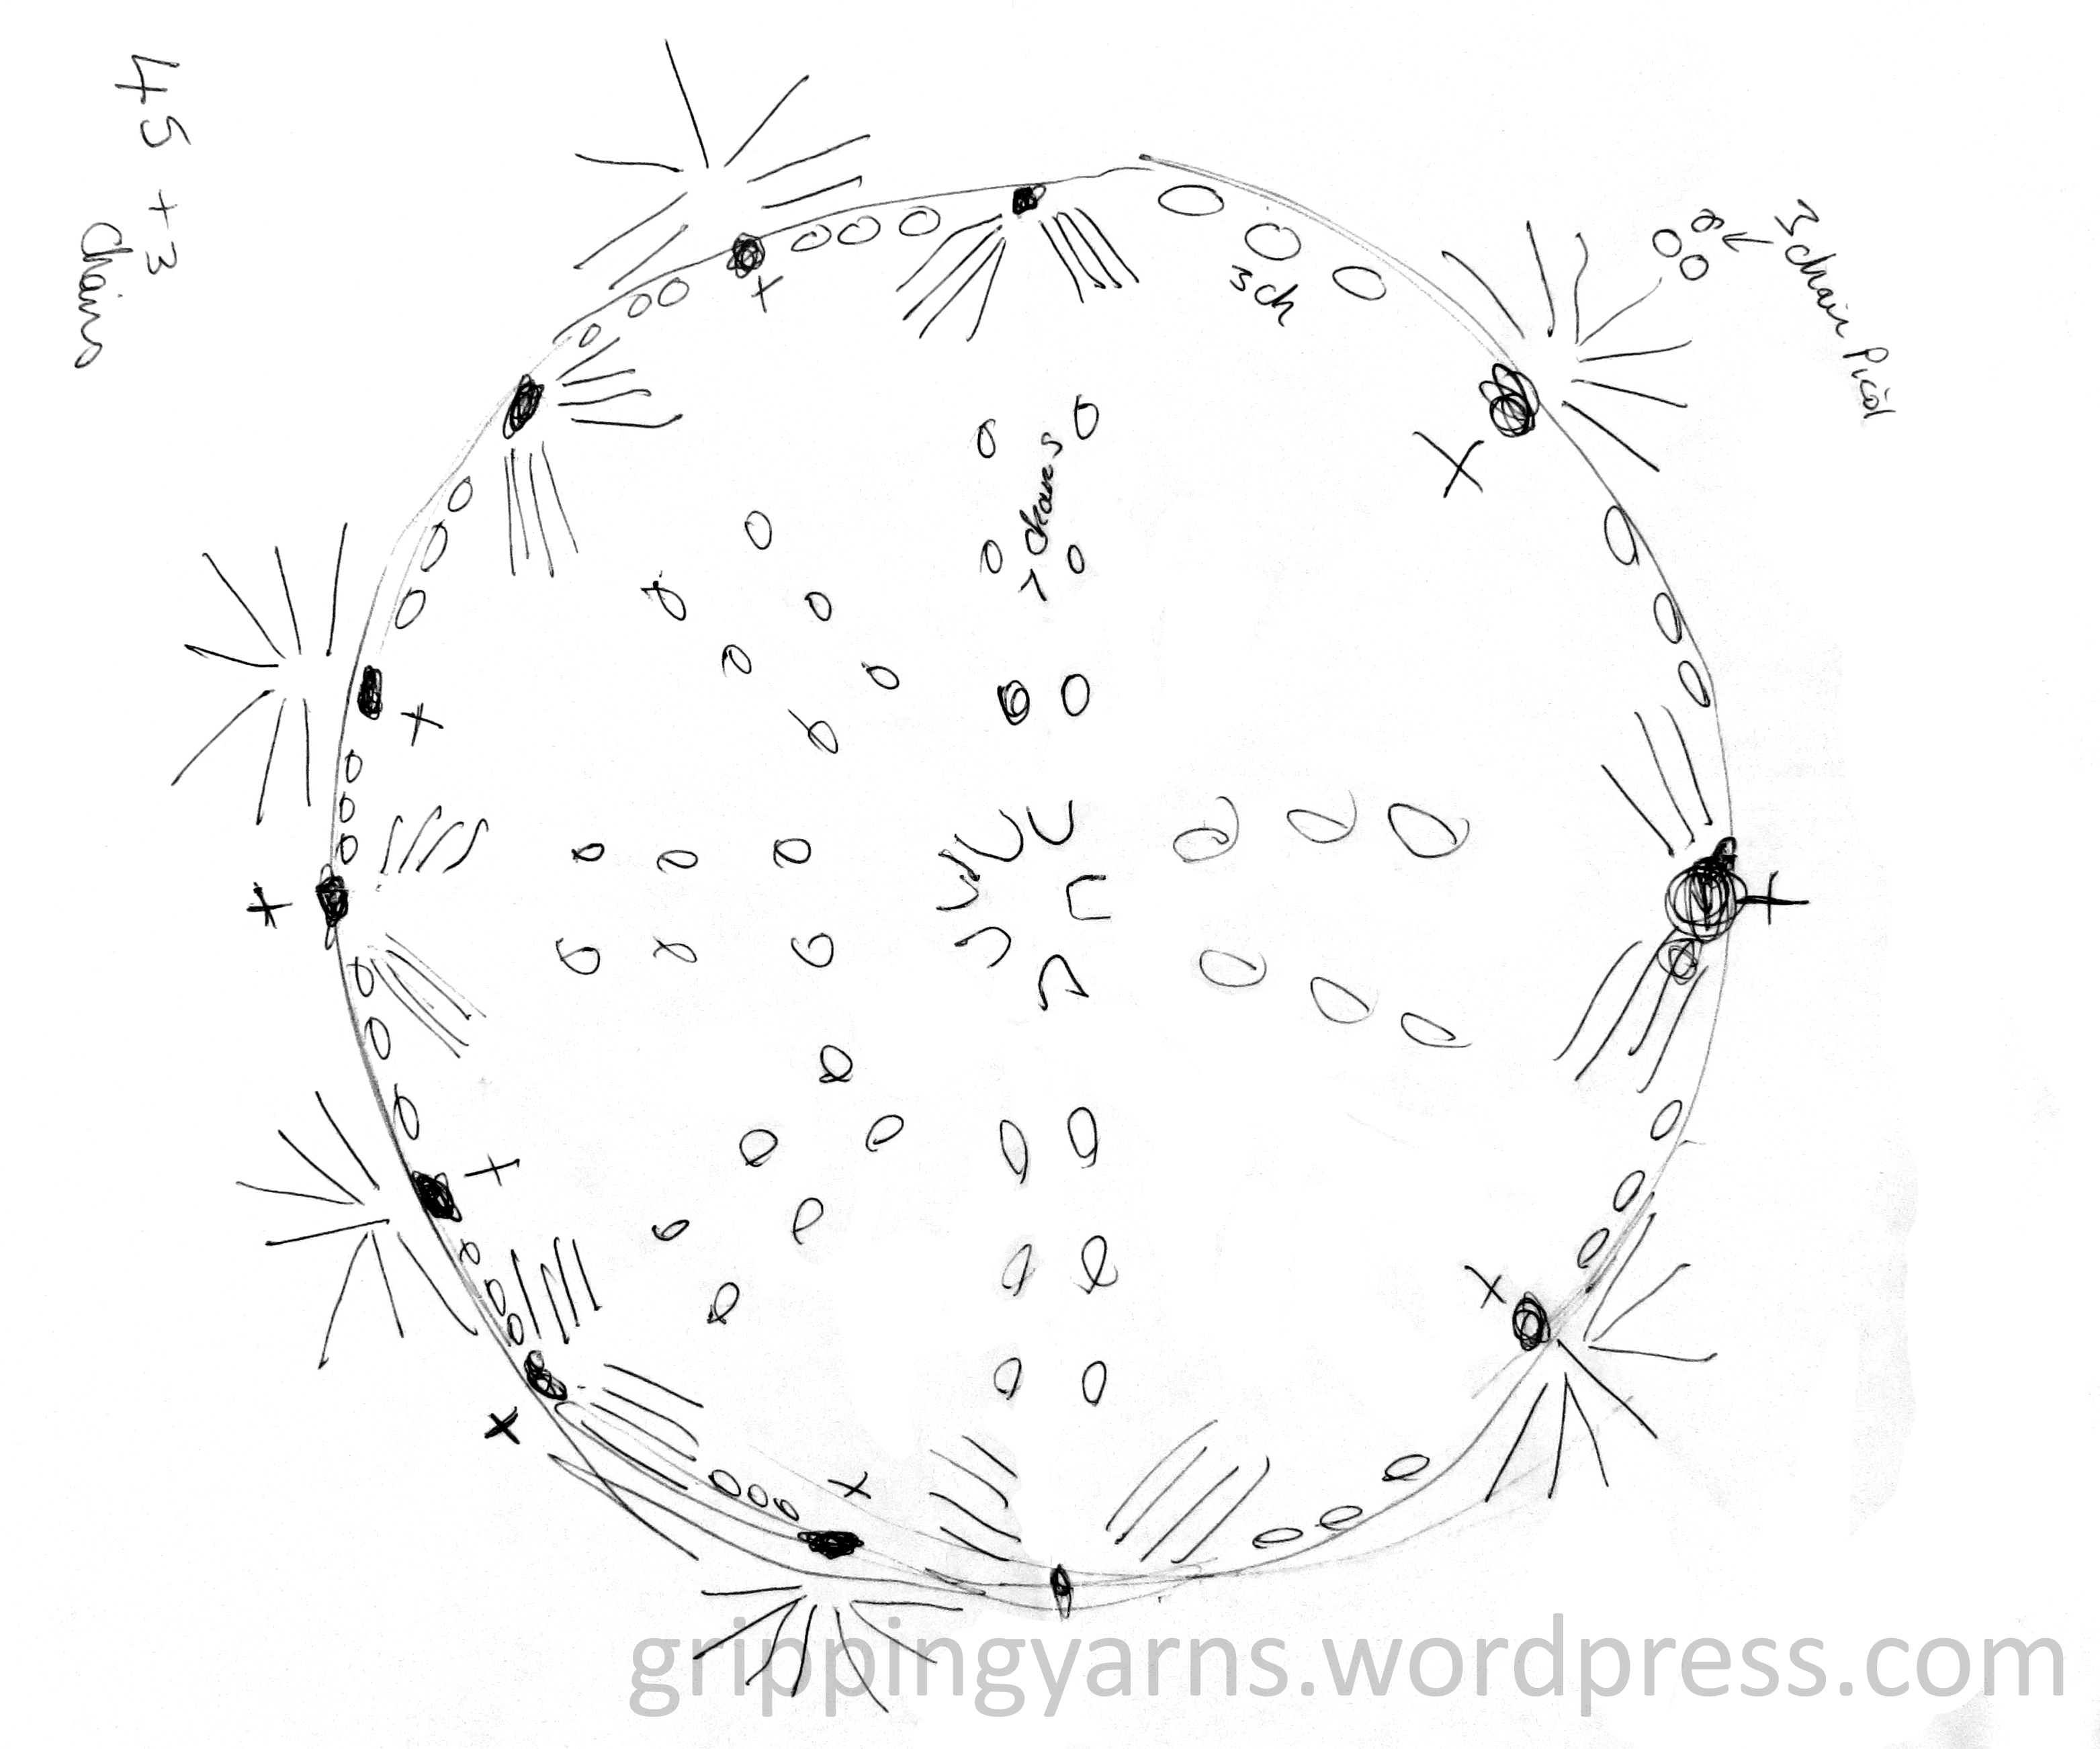
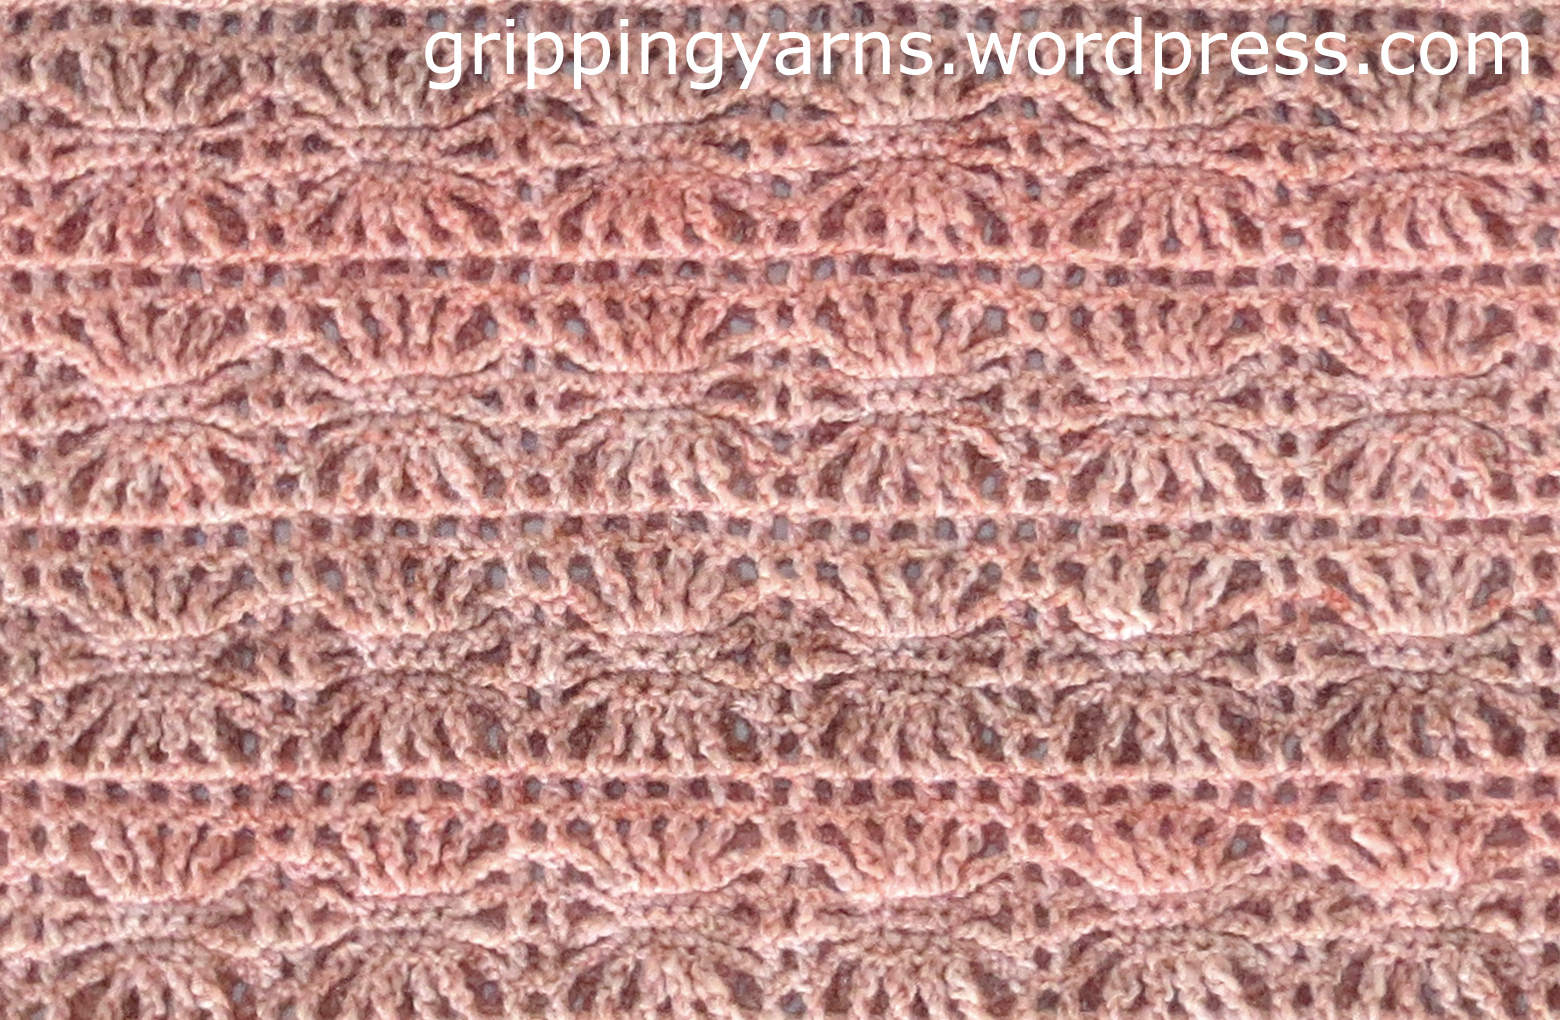
For the lace fabric: Using a Hairpin loom/Staple of 2.5 inches wide and a 3.50mm crochet hook, I made 11 strips of Hairpin Lace consisting of 156 loops each, working two single crochet in the centre, instead of the normal single crochet to form the lace. Then using the cable join method (which entails slip stitching the loops of one strip through the same number of loops of another – in
this case groups of two loops are cabled together) and a pair of broom stick knitting needles, I joined the 11 strips to make a flat oblong length of fabric.

detailshot

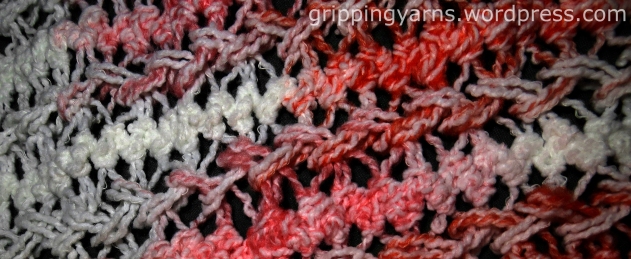
I would normally use a crochet hook to join Hairpin Lace strips however, broom stick needles stop the loops from becoming tangled or being missed, and they also make a flat join.

cuffshot wholeitem

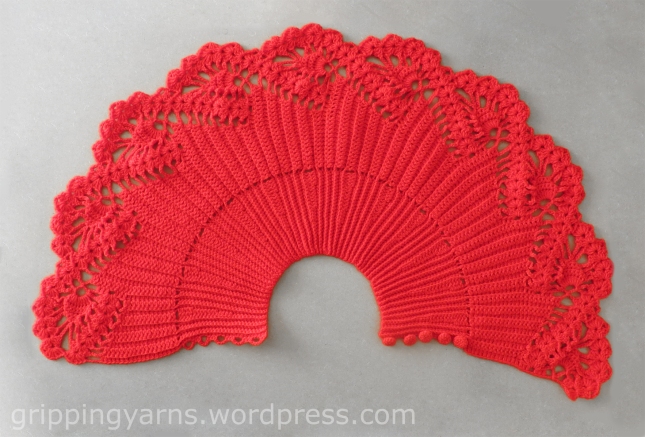
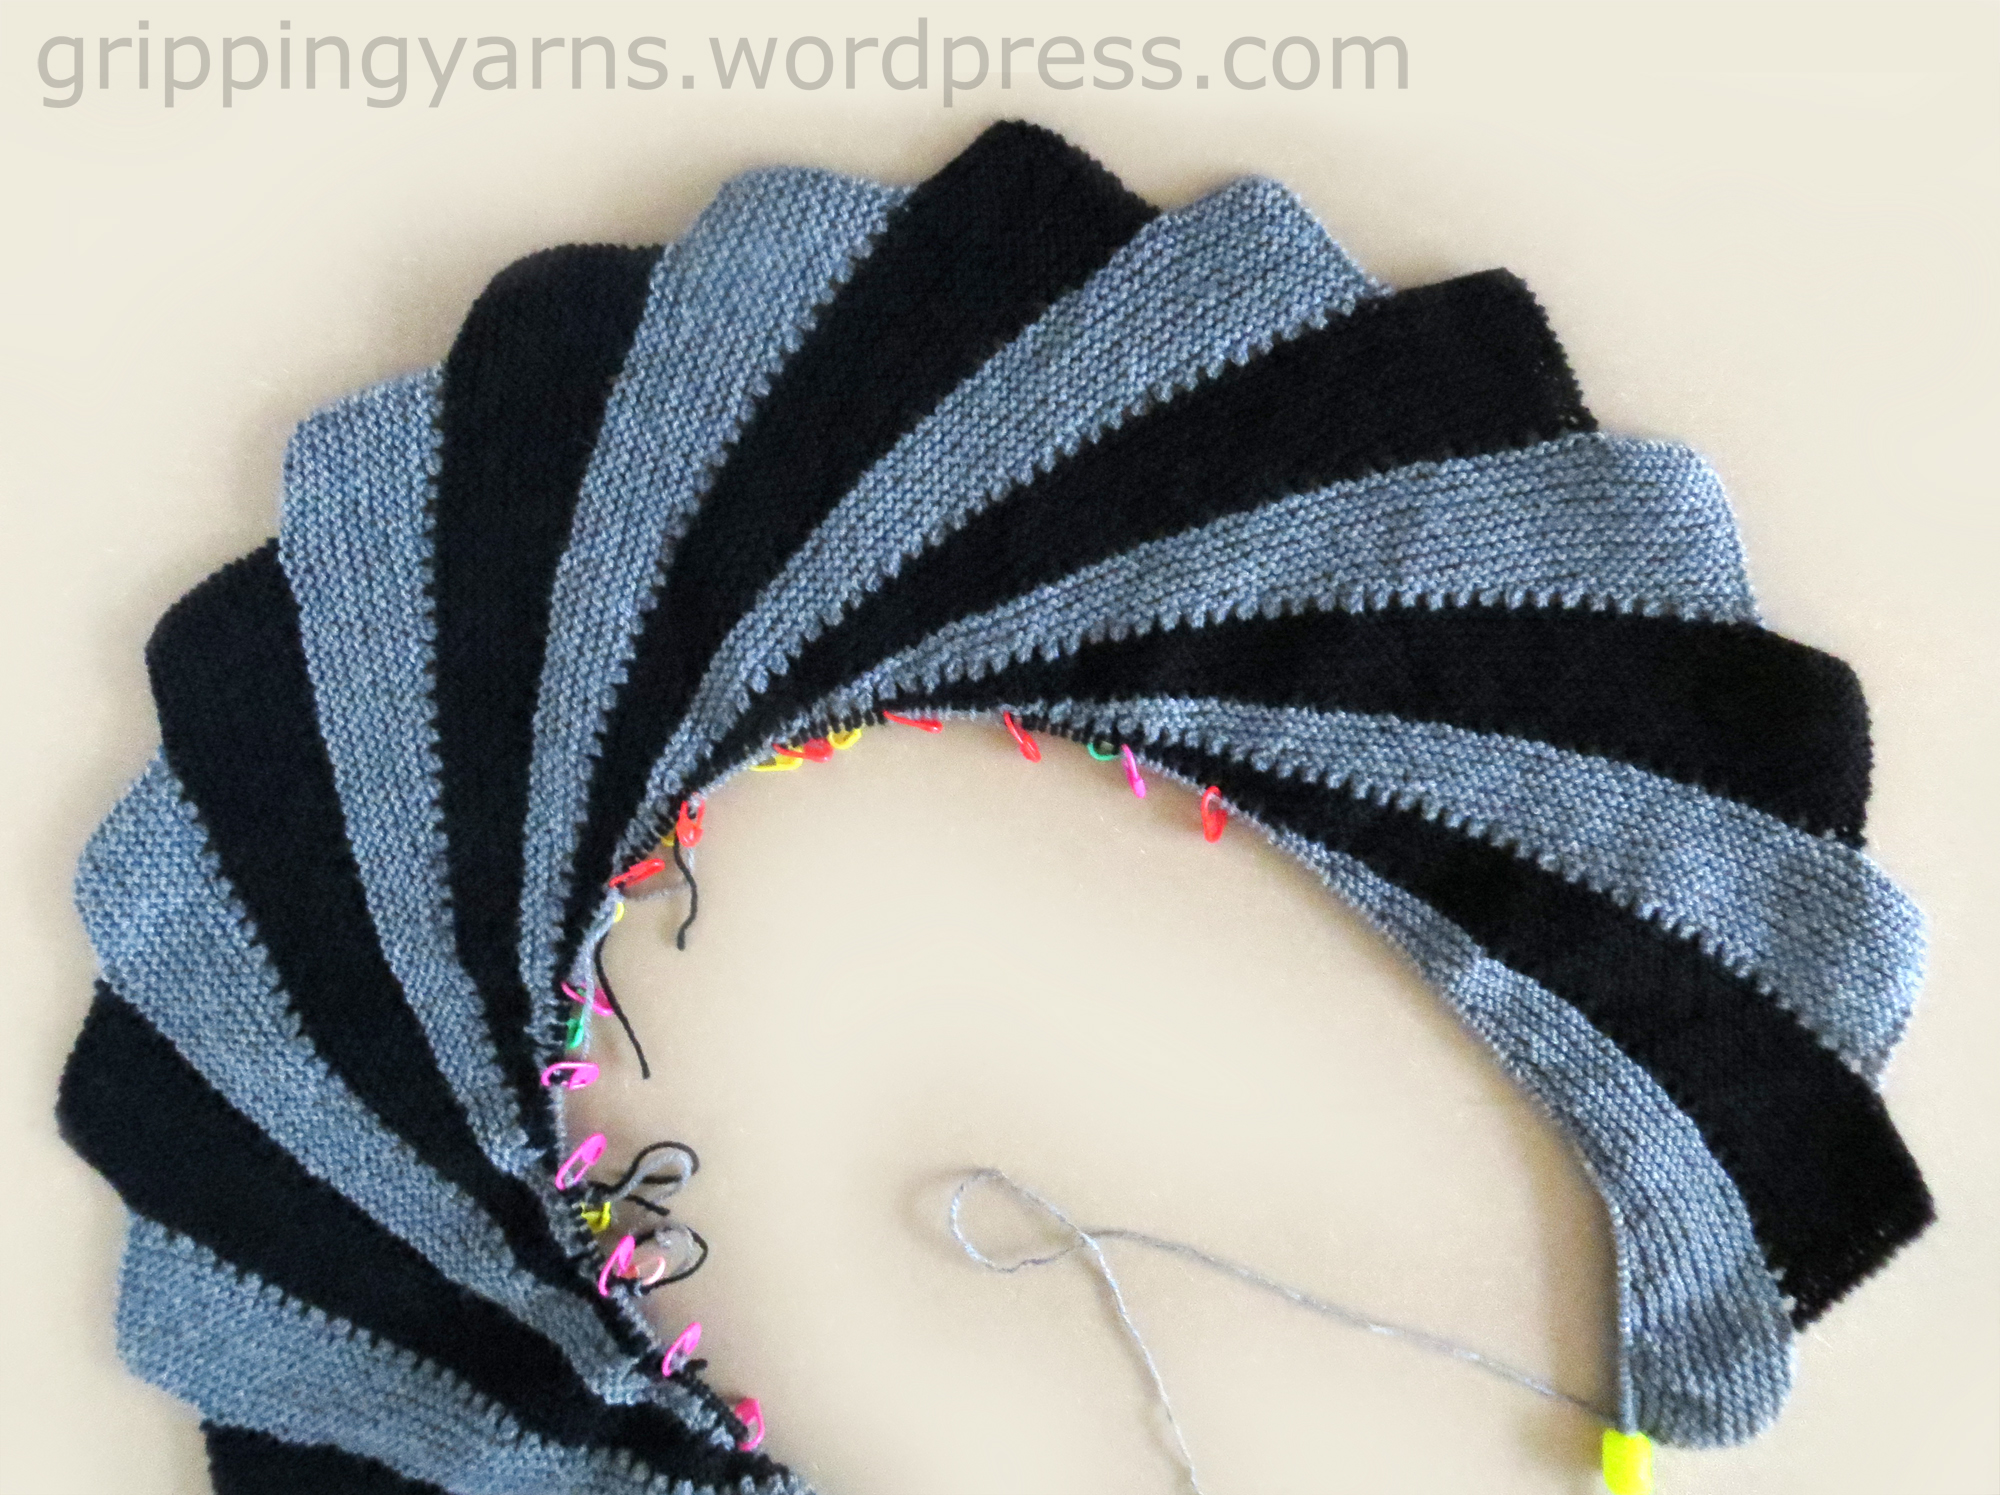
For the sleeve seams: Still using the cable join method, I joined 42 loops on each side at both ends of the length of the lace fabric, leaving 72 loops on each side of the centre of the fabric not joined. The final loop is secured on a stitch holder. I then picked up 56 stitches at the end of each sleeve on four double pointed 3.50mm needles, and knitted 21 rows of K1, P1 rib to form a cuff.

stripshot
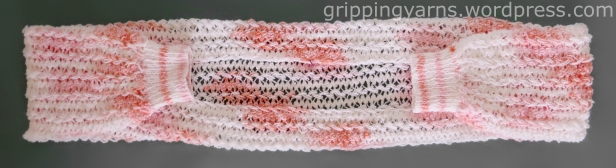
For the back: Starting with the loop previously held on the stitch holder, the remaining non-joined loops in the centre of the fabric were finished using the cable edge stitch (which entails inserting the hook into the first two loops of a strip, then drawing the second loop through the first loop in order to slip stitch them together. The second loop remains on the hook. Continue slip stitching each loop one at a time in this manner until the last loop remains on the hook). The final loop was secured on a stitch holder.

completedstrip wholecuffedshot

For the body: Equally, in each loop of the cabled edge starting with the final loop secured on the stitch holder. I evenly picked up 296 stitches on the four double pointed needles and knitted 21 rows of K1, P1 rib to form the body cuff, then weaved all ends.
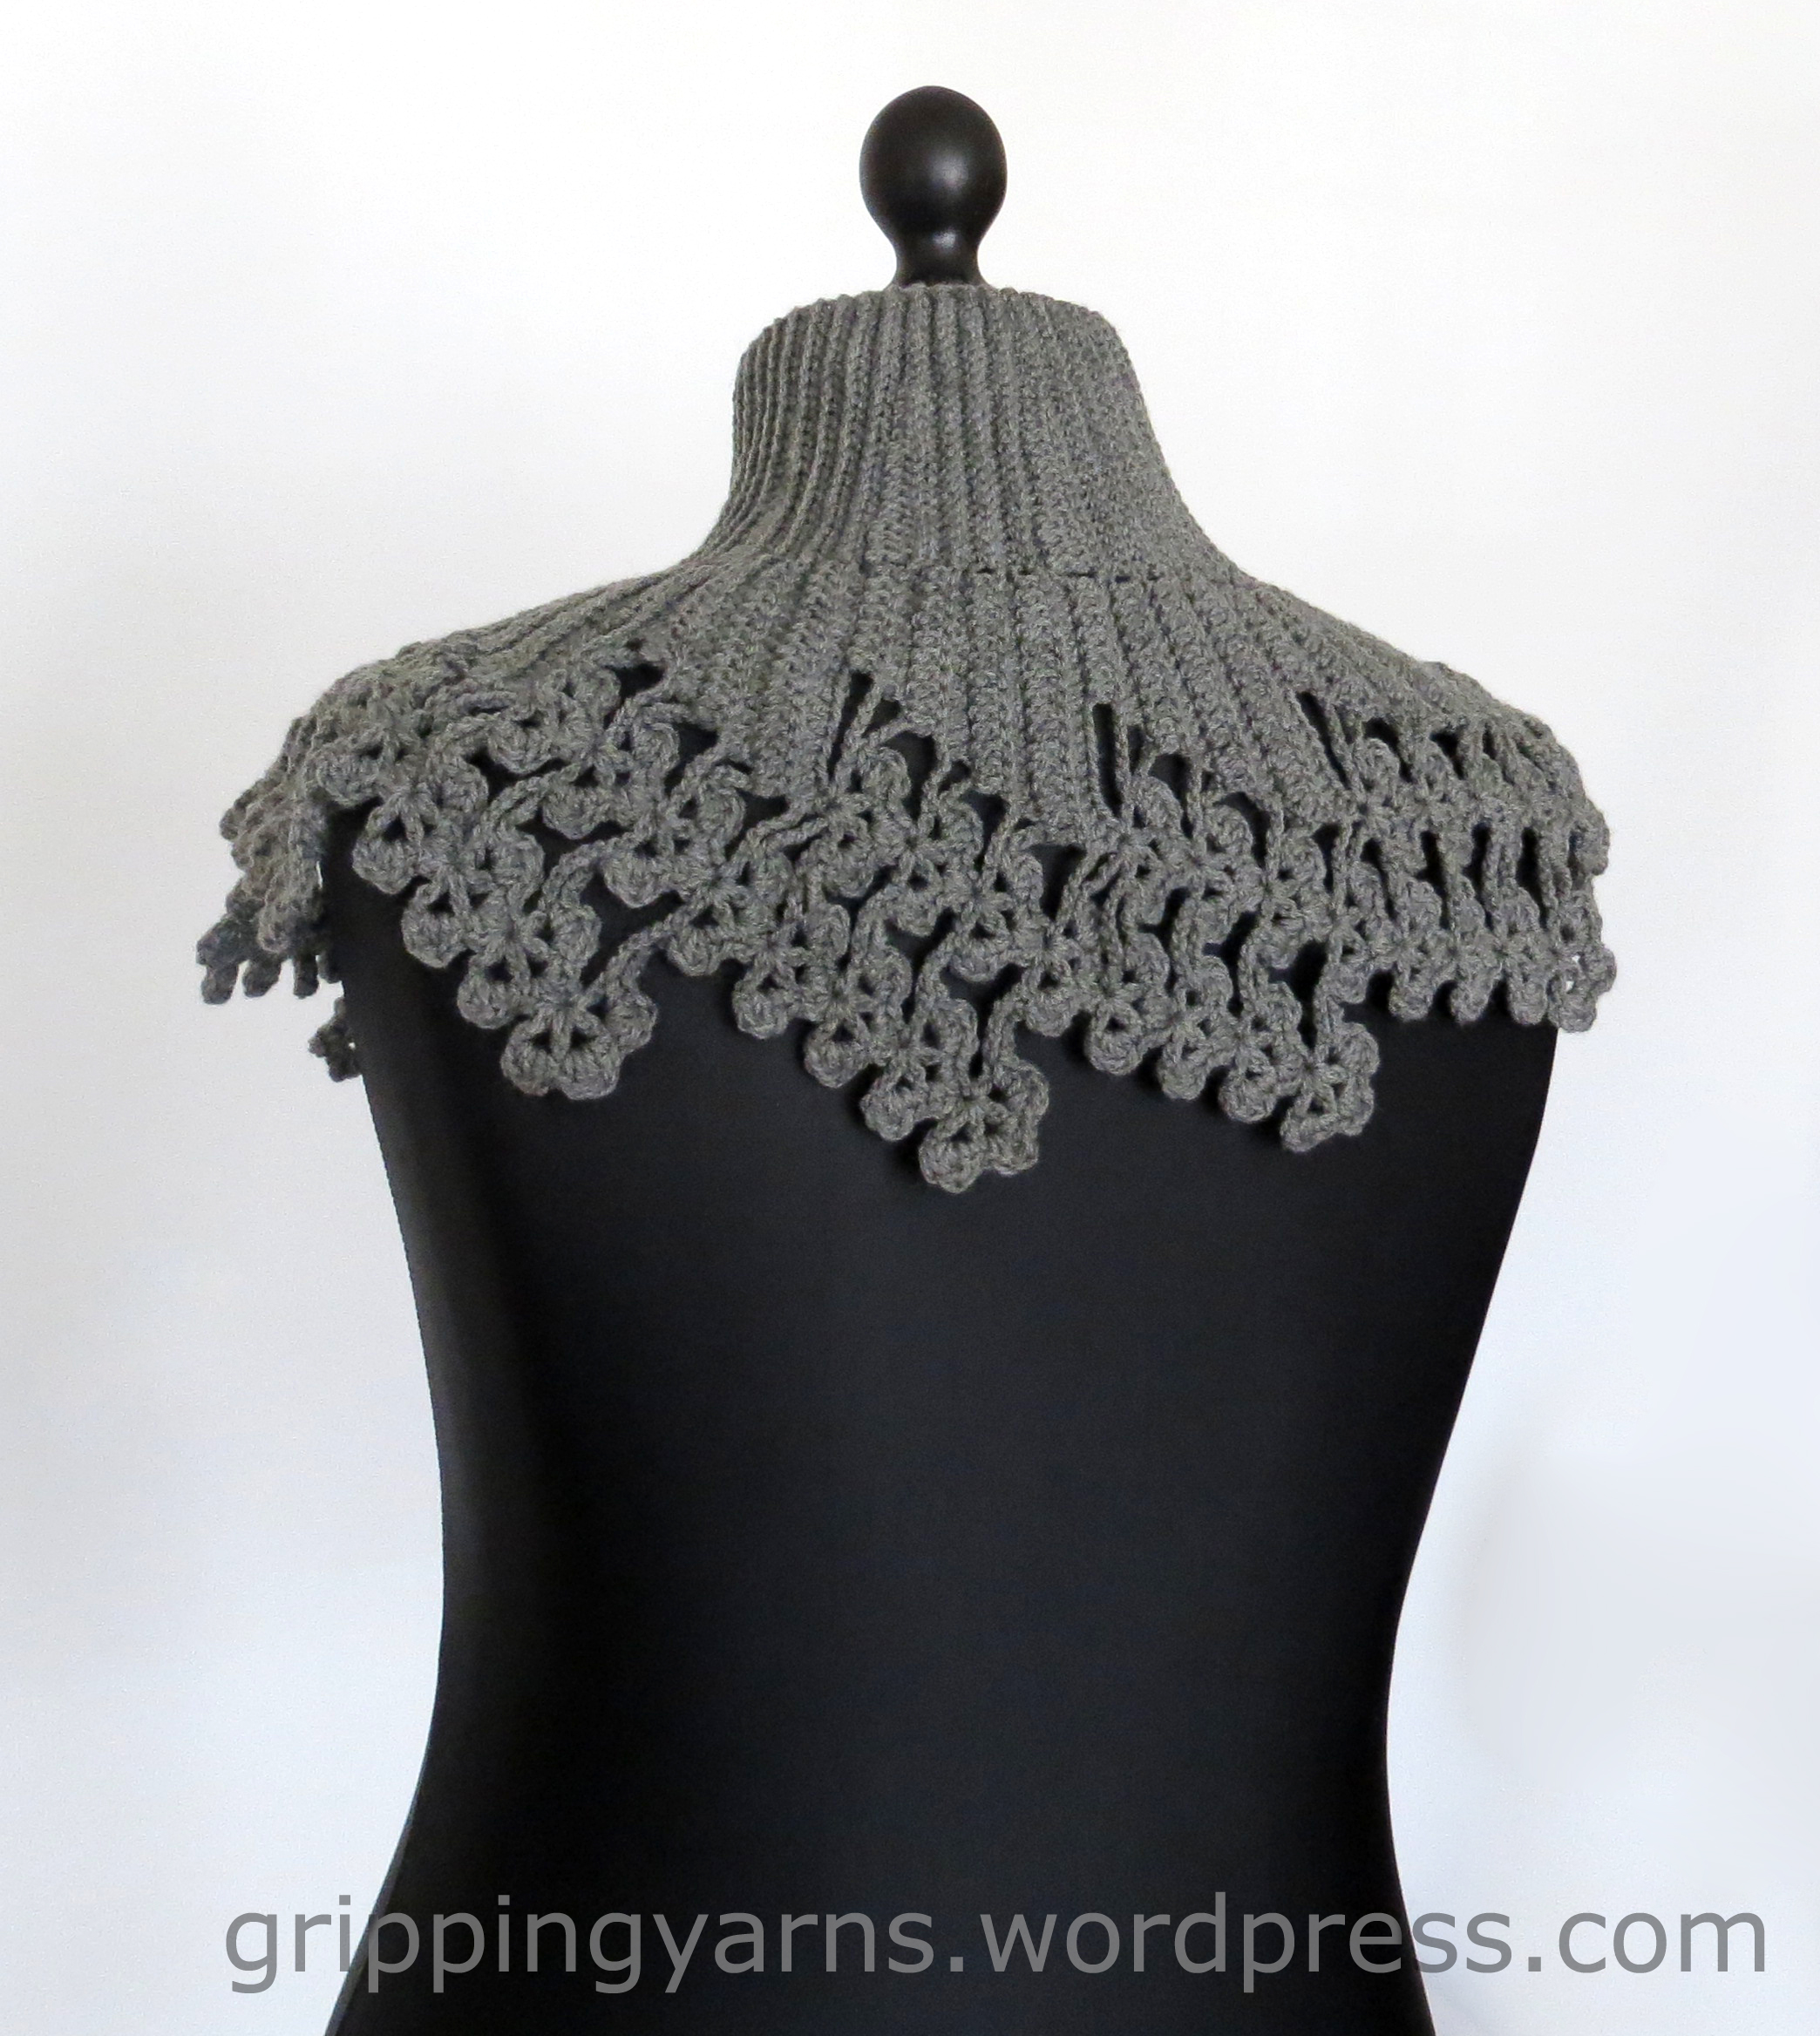
The finished project looks so pretty, and does the job it was intended to do, perfectly!


Tags: , , , , , ,